KM6LYW’s digiPi image is a great companion for new digiPi HAT, below is a short description on the digiPi Image’s first initialization. Flash the SD card image to your TF card, insert it to your raspberry Pi. Also, make sure you have installed your new digiPi HAT on top of your Pi, if not see here. Don’t forget to plug in the short USB-C cable, and you’d better connect your Pi to your local LAN with an ethernet cable. You could also use wifi, but you have to proceed more steps on your PC before inserting the card to your Pi. Here is a guide (via wpa_supplicant file)for setting up your Pi’s WiFi. If everything is completed, power your Pi on.
Now you have to find out your Pi’s IP address, I would suggest to look it up from your Router. You could see the IP address from your router’s DHCP client list.

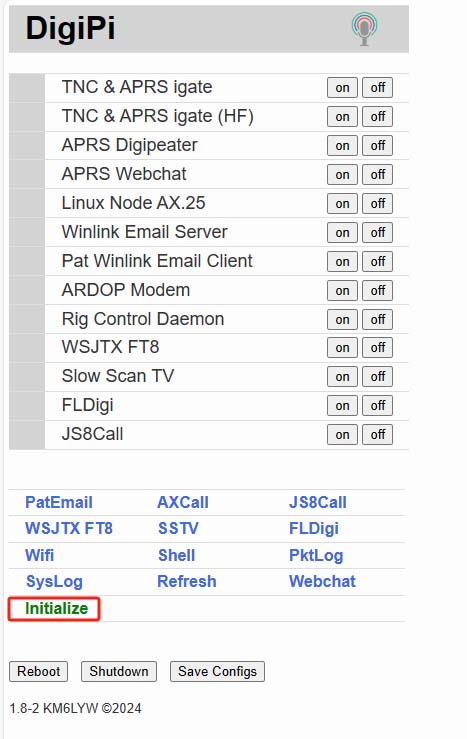
Once you have get the IP address, open your browser and type the IP address in your browser to open digiPi’s home page. Then, click ‘Initialize’ to go to the ‘setup’ page for initialization. You will see the digiPi initialization page.
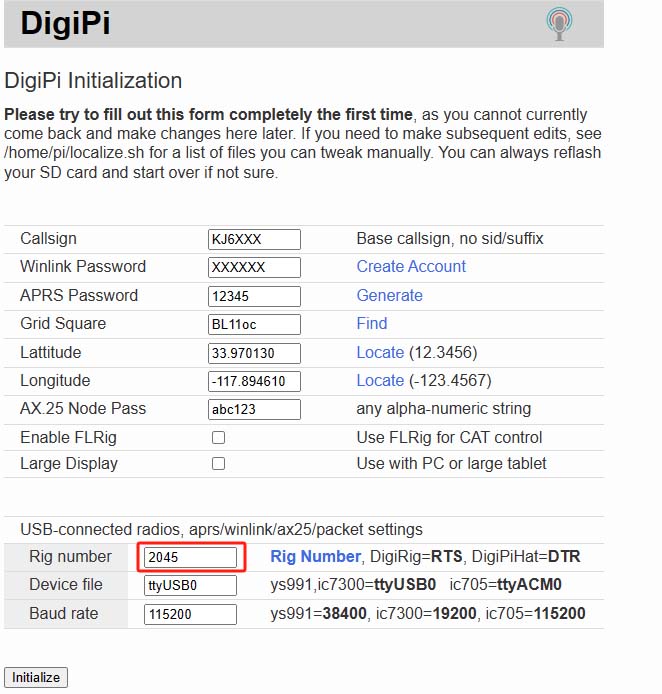
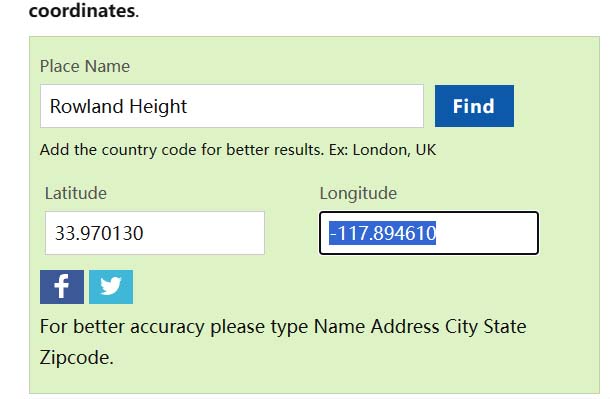
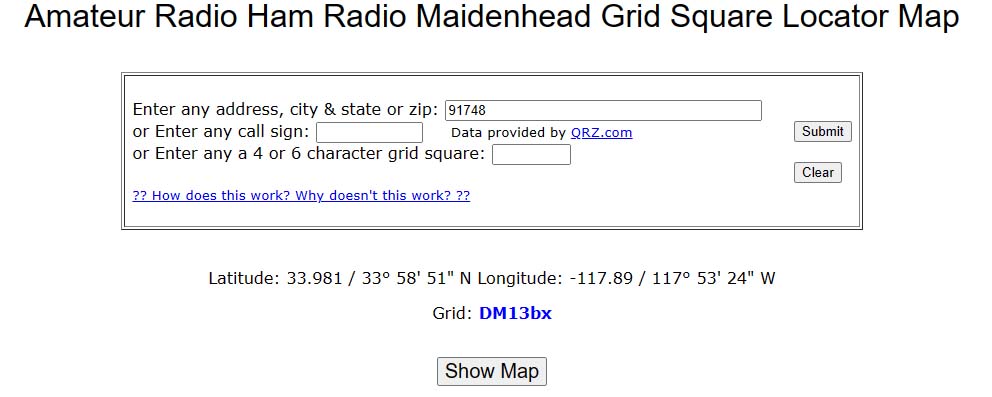
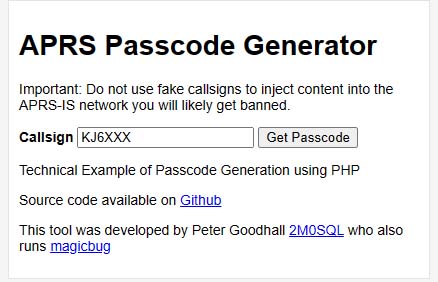
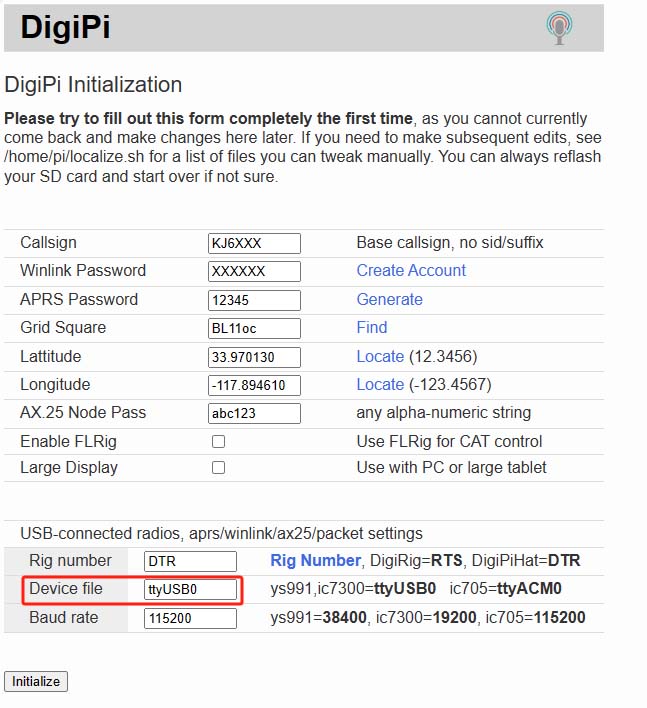
Now, fill your station info in. If you don’t have a winlink account, an APRS Password, you could do it later, just pass them on. The most important items are your callsign, Grid Square, your geogrophy coordinates and things about your radio. You could find your Grid Square and Coordinates by clicking the link next to the blanks. Examples below:
Next, we go to the hardware part of the info, it’s about digiPi hardware and your radio type. The digiPi HAT is designed for the radios without a USB port, but with or without the CAT or CIV capability, radios like FT8x7, ICOM 7000, Elecraft KX2/KX3, which have the CAT or CIV without a USB, and most of the handheld radios or mobile radios, for example, UV5R, UV-K5/K6 have no CAT or CIV capabilities. Since KM6LYW’s digiPi image use the hamlib for CAT or CIV, if your radio is not in the hamlib’s list, you may not be able to use the remote control feature by hamlib, but you may use Flrig instead if your radio is supported.
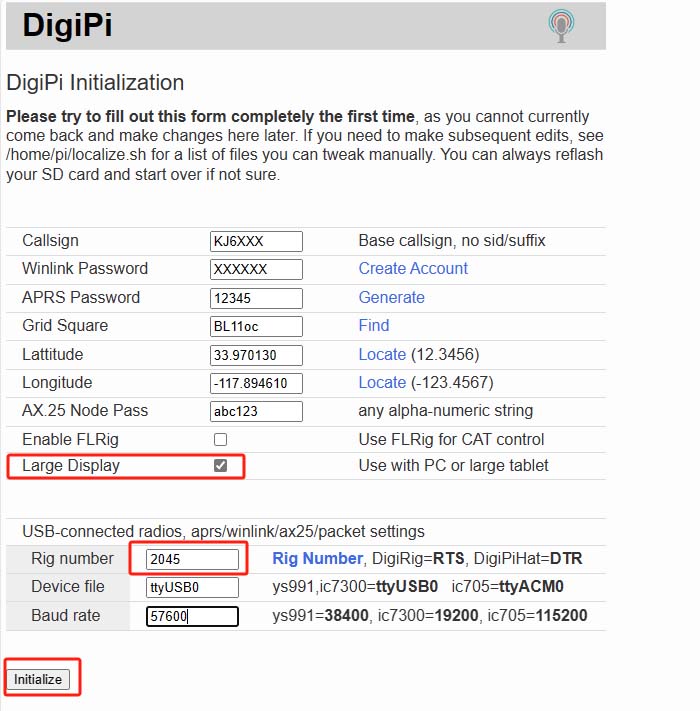
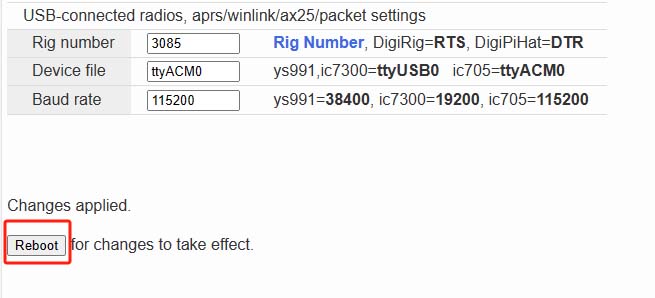
If your radio has the CAT or CIV, just fill your rig number in the field, you can get the rig number from the hamlib’s radio list. Here the number ‘2045’ is the rig number for Elecraft KX3. If you use a handheld radio, fill “DTR” in the field, since digiPi HAT use DTR for PTT. In the ‘Device file’ field, you have to use ‘ttyUSB0’. There are 2 USB-Serials on new digiPi HAT, and ‘ttyUSB0’ is for CAT and PTT while ‘ttyUSB1’ is for GPS. Next, type in the correct baud rate right for your transceiver.
If you use a PC or a large tablet with your digiPi, tick ‘Large Display’ for a better visual effect. Click ‘Initialize’ when everything has been done. Then, it will apply the new settings and you have to click ‘Reboot’ for changes to take effect.
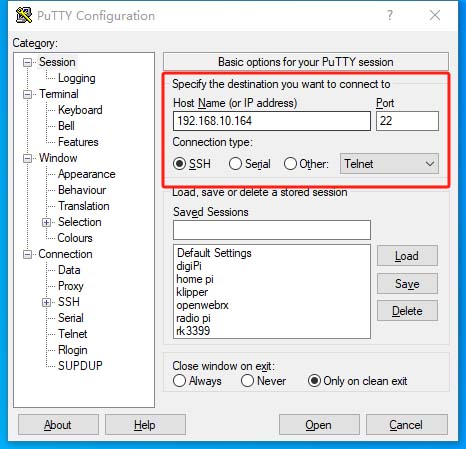
You can only initialize your digiPi image for one time through the web page, normally at the first time when the image is initially booted. Can we change the station info or radio parameter later? Yes, you have to log on to your Raspberrry Pi by SSH, but you need a SSH client installed in your PC, for example, putty. Below is an example for demonstrating how to log into your digiPi by SSH and change your station info.
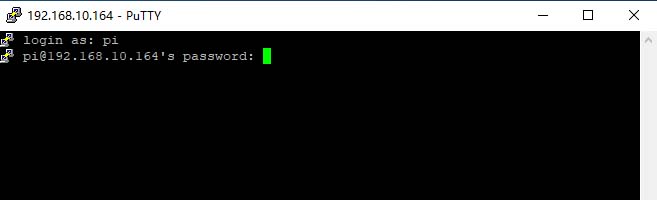
Open ‘putty’, type in your Raspberry Pi’s IP address and port, then click ‘Open’. The default user name and password are ‘Pi’ and ‘raspberry’.
Next, type ‘sudo remount’ in the command line. This is to unlock the protected file system temporarily, you are not able to change anything without this command. Type ‘sudo nano localize.sh’ in the cmd line to edit the initialization script, as you could see below:
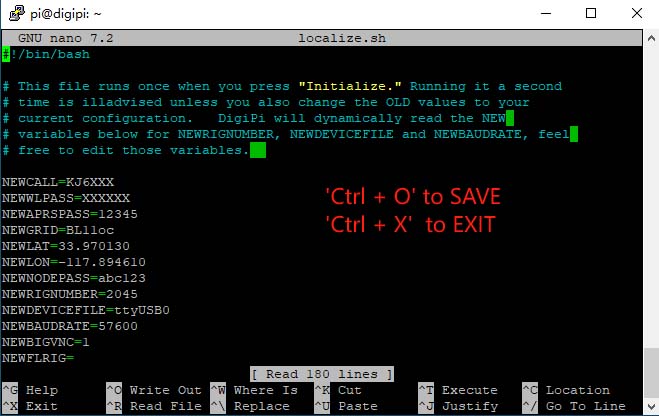
You may have to get used to use the file editor tool ‘nano’ first, here is a video tutorial, you can get lots of tutorials on nano text editor by searching in google. When something is changed in ‘nano’, you need to Press ‘Ctrl + O’ to save(write out), and when everything has been changed, press ‘Ctrl + X’ to exit ‘nano’ editor.
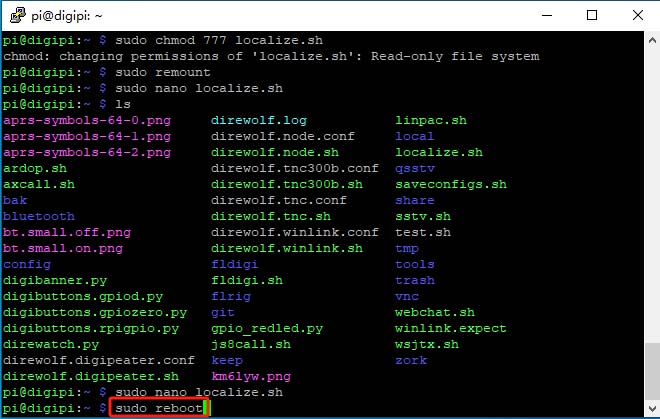
In order to take the changes into effect, you need to reboot. So, type ‘sudo reboot’ to restart your Raspberry Pi. Now, you will use the new station info and radio parameters in the future operation. Have Fun!
reproduced by hand, in contrast